Showing posts with label craft. Show all posts

Thursday, November 18, 2010

TRAVEL Play MAT


PRETTY BABY ON TOP


.


Okay if you are worried about rope and babies - this is not the play mat for you - however my baby the wriggle glow worm that she is has not tangled at all - further more I left the gaps rather small and there is no slack on the rope when the play mat is out -

Okay lets start - I wanted it to like a cracked egg kinda of sort of..

 I cut out two oblong circles approximately 39 inches in in width


I then Cut two other oblong circles 5-6 inches smaller in width

 I cut double thick batting to measure

 Then created the quilt sandwich

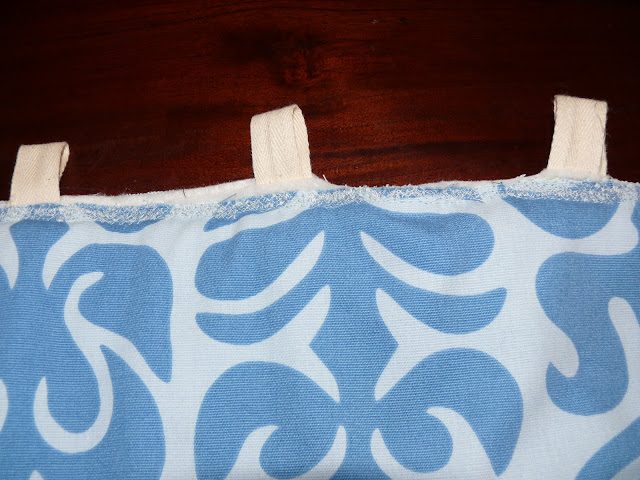
 I then free motion zig zag around the edge and inserted twill loop 4inches apart around the entire circumference of oblong circle

 I then free motion quilted the other two circles on top and quilted a flower on the smallest circle - but of course this open to so many wonderful interpretations.

DRAWN AND READY TO GO -

Friday, November 12, 2010

12. Collect Experiences, Not Things

This a hard one for me to write as I am an avid collector of both, things and experiences. And also Felicity wrote - quite frankly the perfect piece on the subject

Of course if the house burnt down the only thing I would want is our health and safety.

Like Felicity the older I get the less inclined to shopping and things I become (except for my fabric stash - she with the largest when she dies wins you know).

We five live in a three bedroom cottage the kids shock horror all share as one of the rooms is a study work room and quite frankly not ready to give it up for a place some one sleeps in - so I have become rather ruthless at throwing stuff out.  I could be a  hoarder so any school fete I donate to the trash and treasure store and as much as possible. Almost to the point where my partner has to hold me back.

MY travels and life abroad has afforded me the opportunity to have beautiful things and often my experiences are part of those things.

But I find I am also trashing some of those unfortunate experiences in life and realise my memory is increasing selective about what experiences it chooses to remember.

I digress - So I am careful not to completely throw  every thing out as there a memories and experiences attached with them- Like my Pallet of plates the Pallet I found outside our apartment in Leiden - Graham had to ask our neighbour to help carry it as it was frozen solid. They bonded over my lunacy and became very dear  friends as a result.  I sanded and varnished the said  Pallet and now it holds a collection of plates from our travels in Europe.I even dragged it back with me from The Netherlands cause of the memories it holds.

However like Felicity I am trying to gift experiences rather then things - hard to do with our imminent return for Christmas to  Europe - so the compromise I am making things of use - Pot holders. Lets hope they experience making some good food with them and not adding to their collections of junk ............


above is my beloved pallet

Thursday, November 4, 2010

QUICKEST TOTE IN THE WEST

These are simple quick charming little box totes perfect gifts for mothers and daughters - for our trip back, to visit my family in the Netherlands.

Also a great thank you presents for lovely people whom have helped our family this year.

Tools
fabric 
Twill 
Sewing machine


1.Cut two pieces 12 x 18 inch of fabric and try and make one of duck cloth thickness for thickness.
2. Fold inhalf and sew approx 1/2inch seam
3. Box the ends 4.5inch and DO NOT cut as adds a further stabilising effect to base of tote
4. Do for both peices of fabric 

5. Cut staps 14incch I always use twill simple and fast

6.  Right sides facing each pin straps approx 1.5 - 2  inches from side seam 
4. Sew and leave opening at side seam 
5 . Turn Inside out and iron - be sure iron in-between all steps 
6. top stitch 3 to 4 rows from top 
7. Enjoy 
 I thought perhaps I would do a wee giveaway leave a comment regarding favourite colour and will send one out to a lucky reader in two weeks with some felt bag jewellery.


Monday, November 1, 2010

It has been a while

Yes it has been a while - you see the thing of it is I got my self up the duff last year and as I previously mentioned my previous pregnancies are hard work with loads of complications. So being pregnant is a huge commitment weekly to twice weekly hospital visits - However hard work, love and support brought us this divine little creature SARAH RUTH TURNER.

The birth was amazing - everything just amazing really -who would think we could go back to the nappy thang at our age - but between you and me WE LOVE IT and who wouldn't take a look at these chops


So the other thing I have been up to is loads of quilting so here are the quilts on our beds at the moment.


Anneke's quilt


Cameron's quilt


A quilt end


A quilt in the making
a just because quilt
picture quilt ready to be quilted
An other picture quilt
These cot sized are for sale at
http://www.karimu.com.au
the quilt I made for sarah during all my gazillion hospital visits
spare bed quilt
 my latest creation bag jewellery and will be posting a tutorial about this later.


Friday, August 28, 2009

A just because present


Are they not the best kind? I think so!!!!!!!!!! I made this stash of goodies and purchased this book for a very special young lady who has just started eating solids. Her mother and father are the godparents to our Cameron. If we had loads of cash and time - I would send a just because present to them every other week because:
  • They were the first friendship we made in the Netherlands independent of family or friends
  • We lived on top of one an other and heard each others laughter through the floor boards
  • We had great parties together.
  • They fell in love with Cameron immediately
  • Amanda taught Cameron the ice trick
  • They visited me every day when I was hospitalised for Anneke (it was a darn long time)
  • Amanda listen patiently to me when I was scared in hospital
  • Amanda threw the best ever hens night
  • Ton threw the best ever bucks night
  • Ton cried at our wedding
  • They just ROCK.
The Felt picture was made using this awesome tutorial - everything else I just winged. I am holding out for a cheap - green - quick - alternative to travelling to the other side of the planet. We just have to wait till next year - till we can meet this precious girl!!!!!!!!!!!!!!!!!!!!!!!

Thursday, August 20, 2009

The teachings of Mrs Glynn


I made this dress following directions from a Nani Iro's pattern book (ISBN978-4-579-11183-1). I also splurged horribly and bought some of their divine fabric.

So upon embarking back into the world of sewing I took lessons from the amazing wonderful Beverley at Print Charming. However, my sewing teacher from my first year of high school is probably still one of the biggest influences upon me and my machine.

Okay I learnt the fundamentals from my mother and Oma - but it was Mrs Glynn that taught me perfection. Let me add I am hopeless at perfection - but damned if that woman did not try her hardest with me. " Ingrid tack everything - no pins it is lazy and reckless" "Ingrid make a draft copy in muslin" "Ingrid have you measured that hem before tacking it?" "Ingrid you really could be quite talented if you were more disciplined"

Well there you have it, I am not disciplined and so really not very talented - but I am okay with that!

The point of the story is, upon cutting into this amazing fabric it appears the ghost of Mrs Glynn entered me - I did indeed make a muslin copy - I measured my hem - but I am afraid Mrs Glynn I did not and will probably never ever tack again - and I am okay with that, cause really I have never aspired to perfection. Further more I am thrilled with the outcome and have all the amazing women who have taught me to sew, trace, interpret patterns etc to thank.

Mrs Glynn it appears you have the last word, as indeed your instruction has stayed with me and served me well - so the biggest thank you, is to you, this afternoon of yet an other completed project!

Wednesday, August 19, 2009

WE HAVE BEEN........................

The past few weeks we have been


Receiving school awards for safety


playing with tea sets


Making grumpy trips to the art gallery


And making a quilt for Mamma and Dadda's bed


all out of a jelly roll of Japanese Fabric - I bought at a craft fair.


Pride of place on our bed - I think I will need to make matching pillow cases!


Done and Done- off to tackle an other project

Wednesday, July 8, 2009

Play Dates


My dear mother worked - and thus was not around to provide or ferry us to play dates. This was not by choice and I always vowed that I would be around to allow my kids to have and host play dates.

I am so fortunate to have two day a week job - I have the ability to function in the so called real world, I work for two great women. Refreshed, I spend the rest of the week with my loves.

Thursday is play date day.

Cameron has developed a really lovely group of friends - in particular there is this awesome foursome - we all live close by and this foursome comprises of two boys and two girls - nice an balanced.

To make the latest play date more exciting, I made capes inspired from the ever wonderful stitched in time. I made the capes out of calico then appliquéd their initial to each one. When I collected the awesome foursome - I had them spread out over the floor ready for the kiddo's to decorate with fabric pens.

The capes were worn the entire afternoon and through many games of simon said. Great gender neutral activity!

A women possessed

I have developed a quilters callous trying to finish this my first quilt. Here is the reason why - about two weeks ago, I went to the Sydney quilt and stitches show, whilst discussing the use of fabric pens with a seasoned quilter - she warned me of the perils of using fabric pens (even clover) on white cotton. Apparently they leave little brown residual marks, even when laundered. So I went home with the soul purpose of FINISHING,this, my first ever quilt.

The photo's do not show it - but indeed this wise woman was right - unfortunately there are some residual brown marks - however it is slight and my eye does not rest on these mistakes. More importantly my four year daughter loves the quilt and I hope it is in her family for years to come.

Cam bam you're next my love!


Thursday, June 4, 2009

DIY FELT FRAME

So I made this photo frame out of felt for one of the many babies born to our clan. I was inspired by tiny photograph buried in the back of cotton time a Japanese craft magazine . So here is a tutorial on my version


Tools

Felt
Needle
thread
Snap Fastener
tiny bit of stuffing
Tiny bit of ribbon
Roving wool for dry felting

First I created a template - as I have no compass I used circular objects around the house - my circle measured 16.5cm and the inner circle 8.5cm


I then cut out the front piece from my gorgeous stash of felt from winterwood

Be careful when cutting the inner circle, I used a Stanley knife to make the initial cut.


In the name of economy the remaining circles were cut from ordinary felt that I purchased from spotlight. If I were feeling more extravagant I would use winterwood felt for the entire project - but alas this is my comprise.

I cut two doughnut rings and two full circles


Blanket stitch the inner circle of the two doughnut rings together


I then needle felted spots on the front of the frame - I think stripes would look way cool as well - imagination being your only limitation I suppose.


You need double thickness for the entire frame to provide stability.

Add snap fasteners to frame - position at the top. I went through both layers of the backing of the frame and just through the backing layer of the front of the frame


15cm piece of ribbon which I wrapped around the snap fastener of the back part of the frame


Looks like this


Now blanket stitch the outer side of the circle. Ensure you stitch all four layers together leaving a gap at the top of frame large enough to insert photo. Then stitch front and back layers separately.


You could leave it as is - but I decided to add a little somethin somethin. So a cut out a little bird shape - two identical pieces.


Stitch them together and gave the wee bird a gentle stuffing


Attach bird to top of frame - insert stunning photo of delicious baby and hang.